• Welcome
  • About
  • Photography Adventures
  • Video Library
  • Blog
  • Contact

Chris Askew

  • Welcome
  • About
  • Photography Adventures
  • Video Library
  • Blog
  • Contact

Shop House (Barndominium) Build Introduction

Over the past two years I have been working on building a home and I thought I would share some of the progress for the first time. I have been taking photos and videos throughout the process but today seemed like the perfect day to share an update.

My build is a little non standard but is gaining in popularity. Some would call it a barndominium but I like to call what I’m building a shop house since it looks more like a commercial shop from the outside and since I am using red iron as my main structure. Either way it will be a large structure containing both the shop and house under one roof which makes it a great fit for me and the work and projects I do.

Since this is not something that everyone does but at the same time with so many people interested in doing similar builds I wanted to share some of my experience. I would also be happy to answer any questions you may have by clicking the button below.

I hope you enjoy this walkthrough and stay tuned for more updates!

Ask Me A Question
tags: shop, house, build, barndominium, red, iron, construction, concrete, custom, barn, pole, siding
Monday 03.21.22
Posted by Chris Askew
 

How To Replace Window Regulator - 2003 (C5) Corvette

The passenger window on my 2003 Corvette has been giving me trouble for a couple of years now and I finally decided to fix it.

After searching online for how to remove the window regulator I realized that the information out there was not very detailed when it came to understanding where all the clips and bolts were to take the door panel off and remove the window regulator.

I was able to get the job done with minimal effort but as an afterthought I decided to make a video while the door panel was off and show, in more detail, the location of all the clips and bolts so that someone else trying to do the same job might have an easier time with it.

I ended up going with an aftermarket window regulator just to save a little money. I also had to replace a plastic weather/noise barrier due to it breaking into peaces during disassembly. I will post all the parts and tools used for this repair along with the price and where I bought them.

If you have any questions about the process feel free to contact me below.

Tools / Parts:

  • 1997-2004 Corvette Door Window Regulator Right $129.99 (Order Here)

  • 2003 C5 RH Door Panel Water Shield $42.10 (Order Here)

  • Trim Removal Tools

  • Ratchet and Socket Set

  • Torx (Star) Driver Set

Need More Information?

Watch Video Below For More Detailed Instruction


Step 1:

Remove door latch trim by carefully using a trim removal tool. Be careful to not damage your door panel finish or break the small connector clips.


Notice the location of each of the five clips here.


Step 2:

Remove window switch. Carefully pry from front contacting only the metal plate as shown here. This part will break easily if improperly removed. Once the switch is removed disconnect the wiring harness.


Step 3:

Remove door panel. Notice in this picture there are two nuts located under the the door handle that will need to be removed. Once the nuts are removed locate each of the six plastic studs with a trim removal tool. Pull outwards to release them from the door.


Once the six plastic studs are loose you can then lift the door panel strait up and the three clips at the top of the door will pop off with minimal effort.


Step 4:

Remove the door speaker by removing all six bolts. You may also need to use a trim removal tool to pry the speaker off the door. Once removed disconnect the speaker from the wiring harness and set aside.


Step 5:

Remove weather/noise barrier. This part is installed with adhesive and will need to be pealed off. This part may be brittle and may fall apart when removing. For this reason I have included a link to the site where I ordered this part in the tools/parts list above.


Once removed you will have full access to your window regulator.


Step 6:

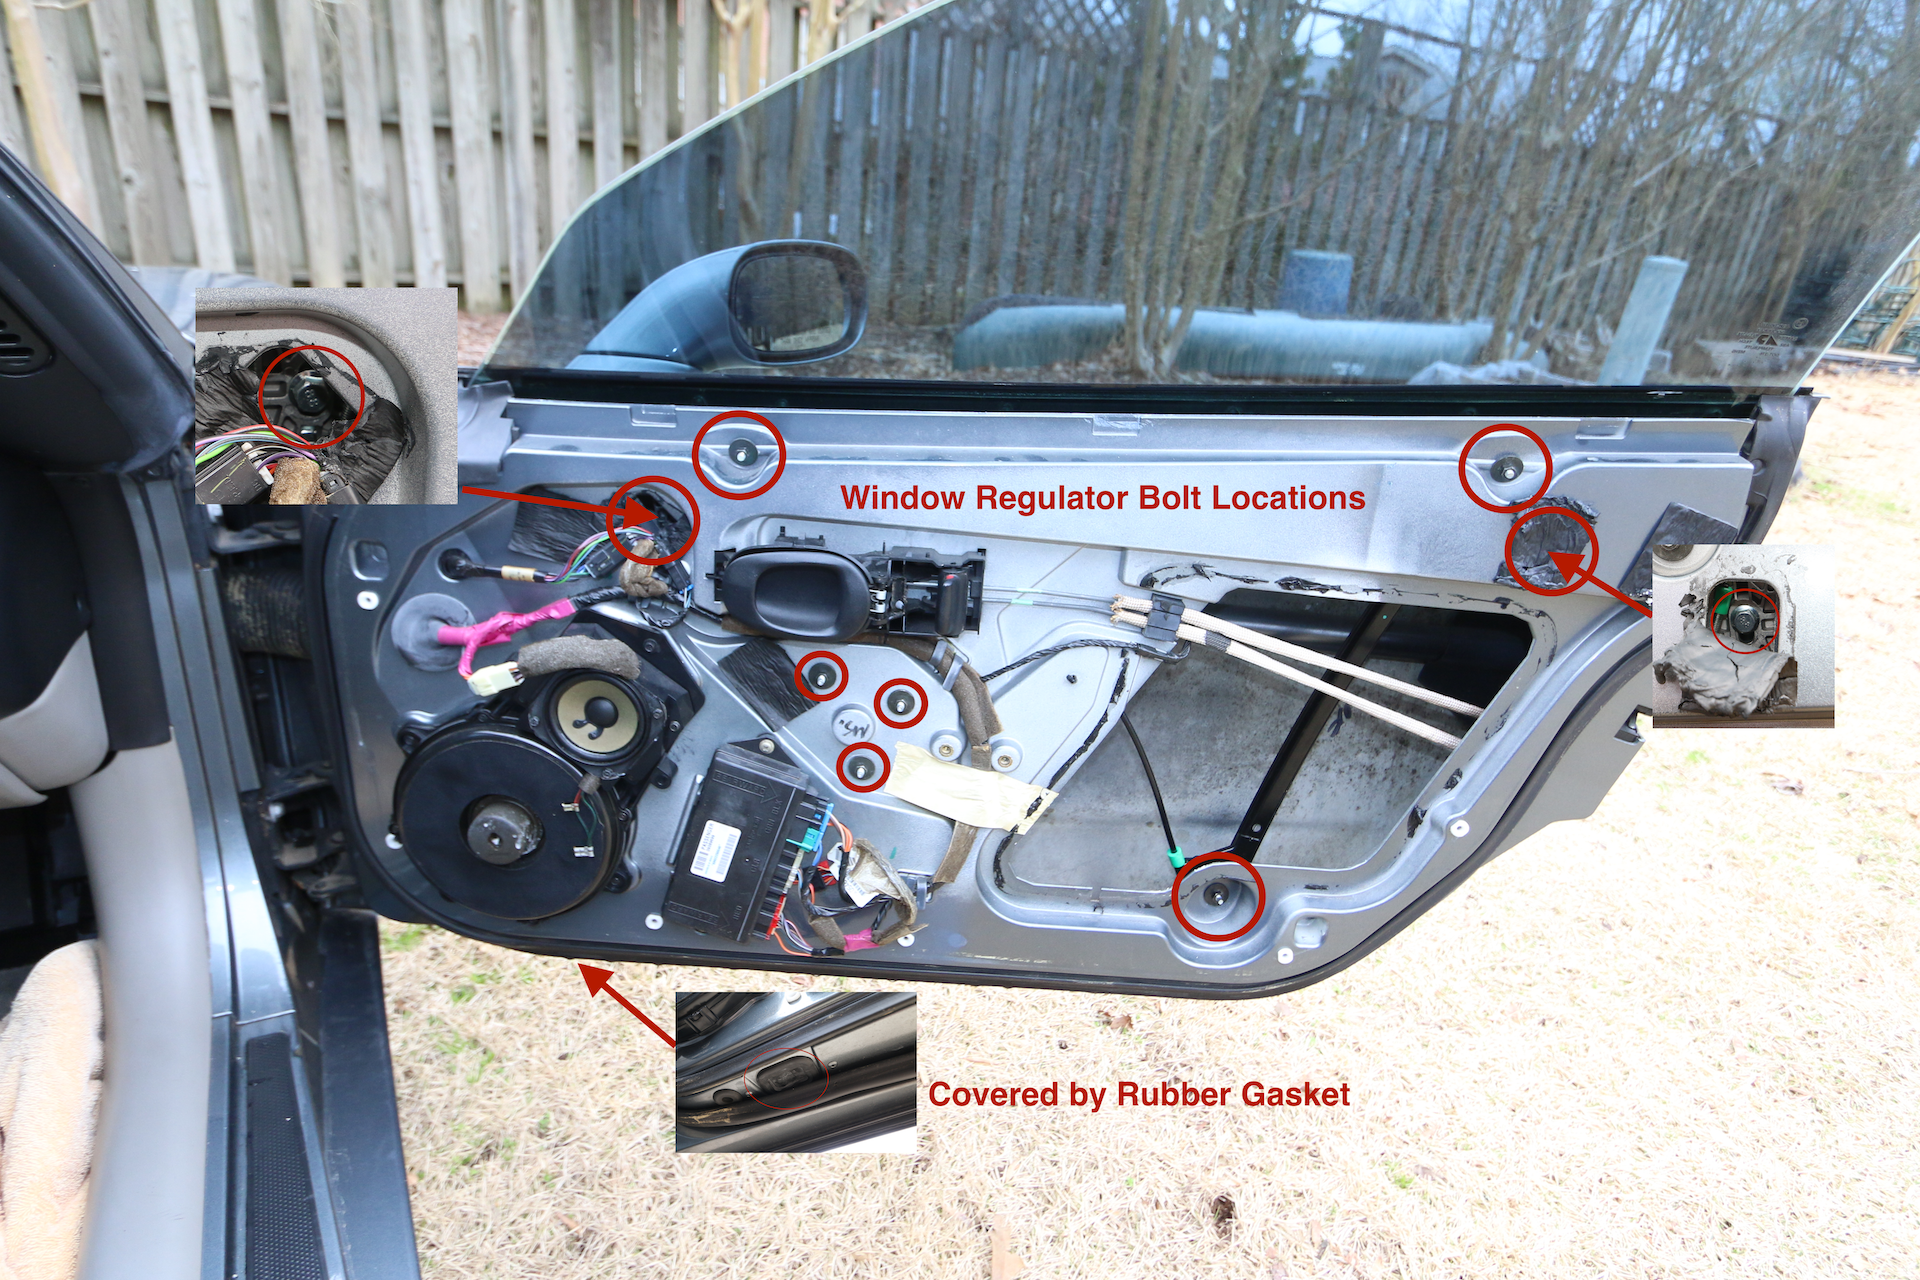
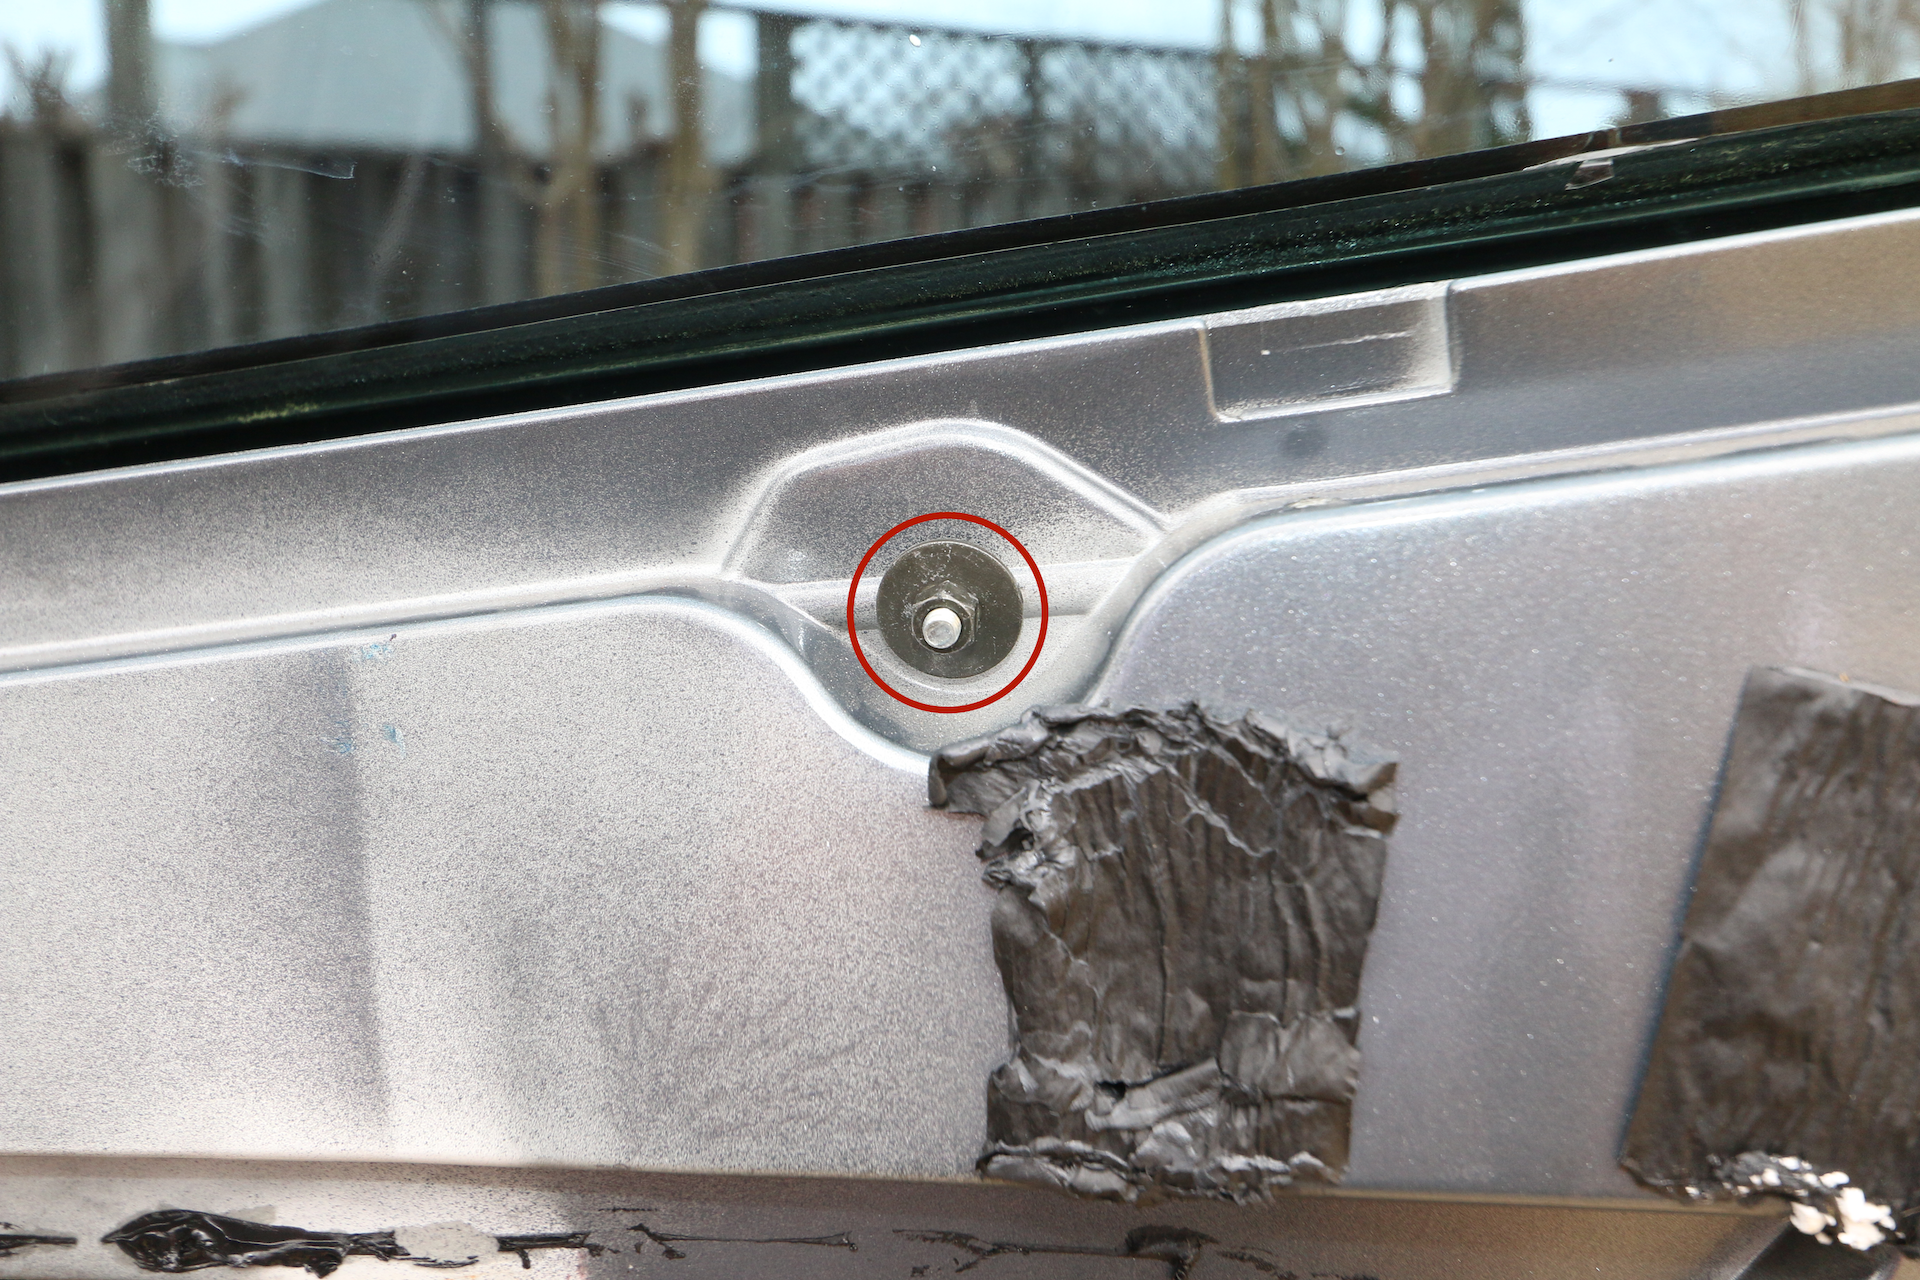
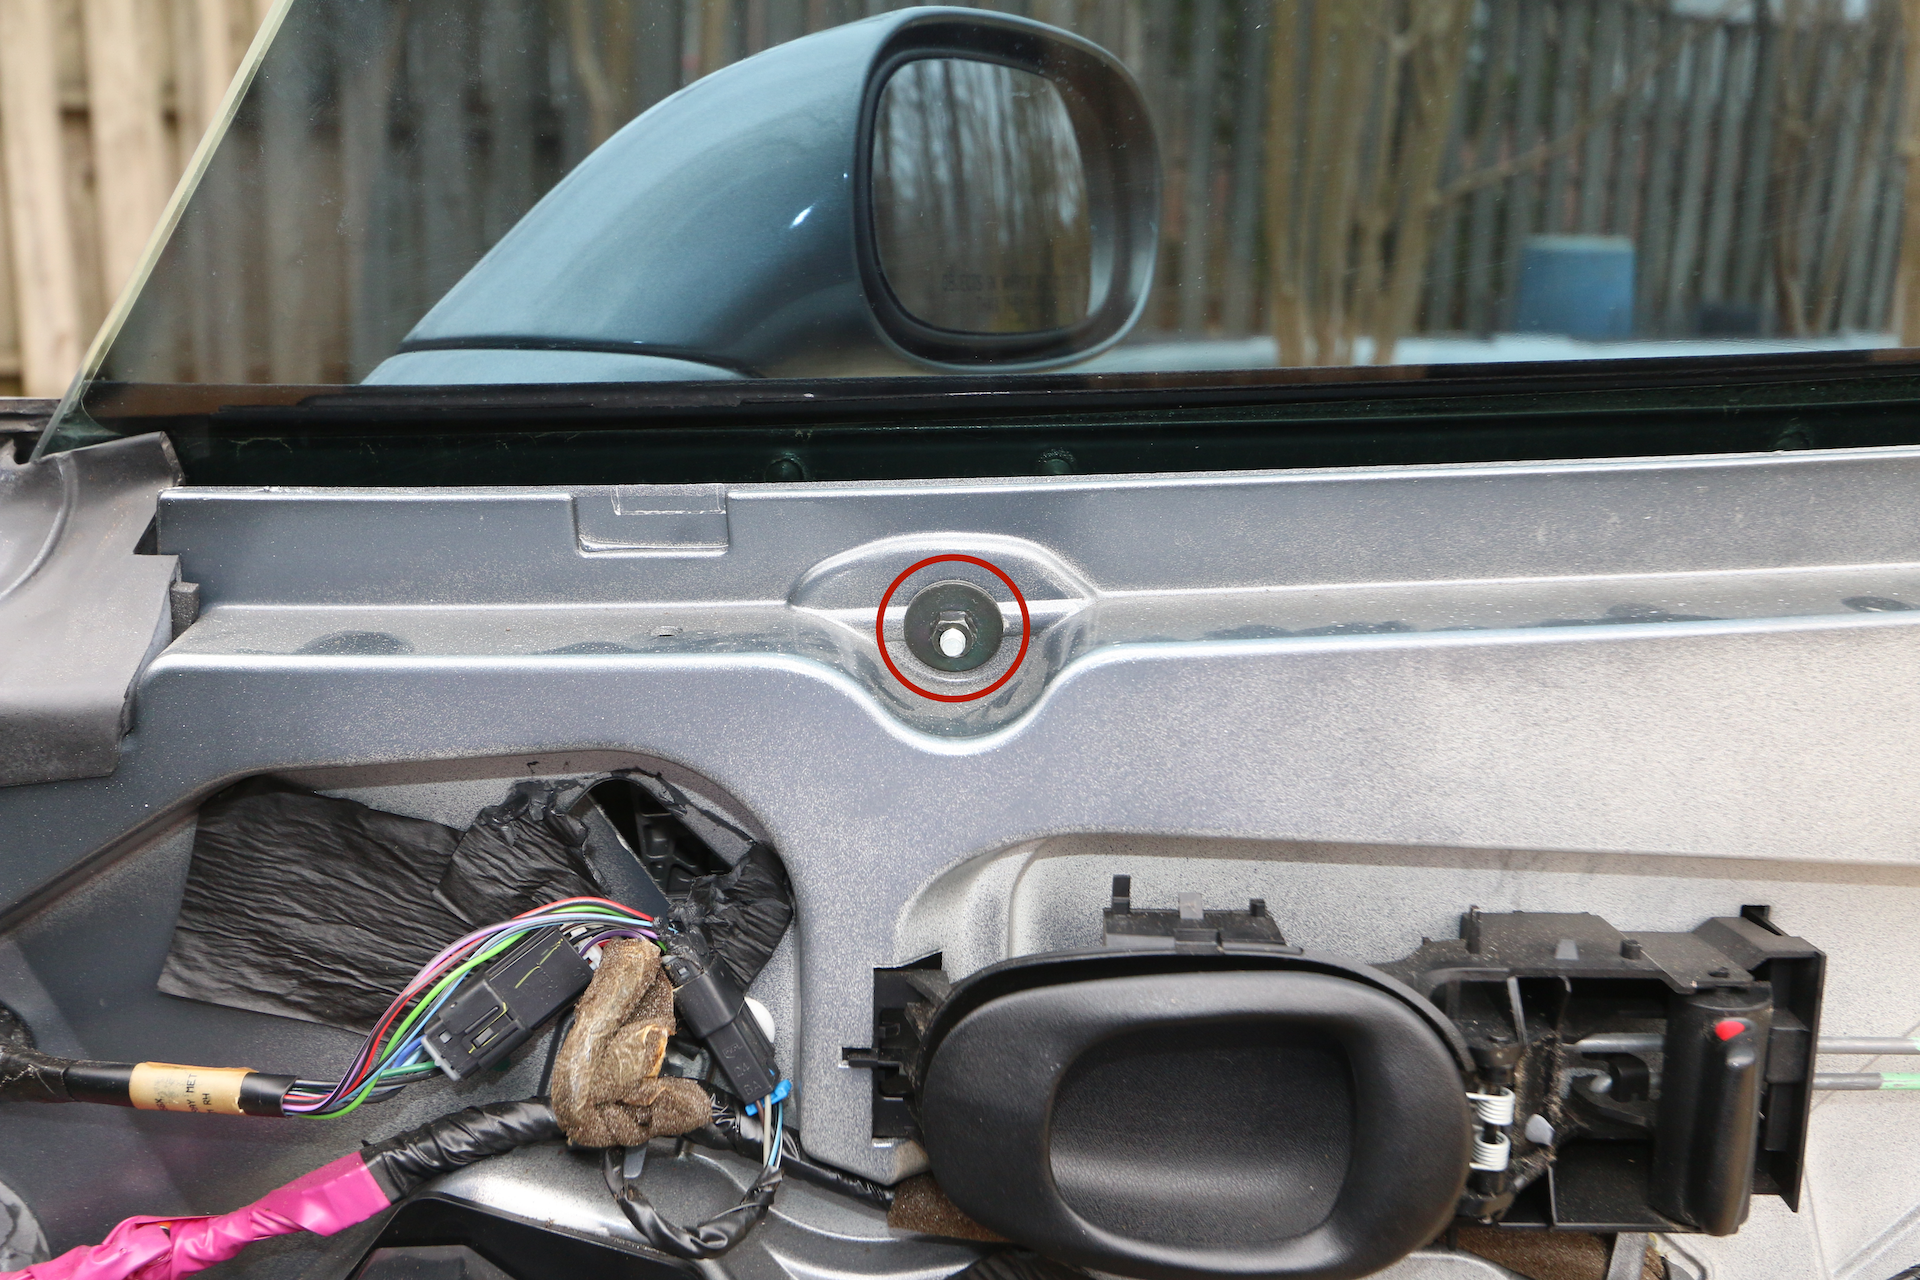
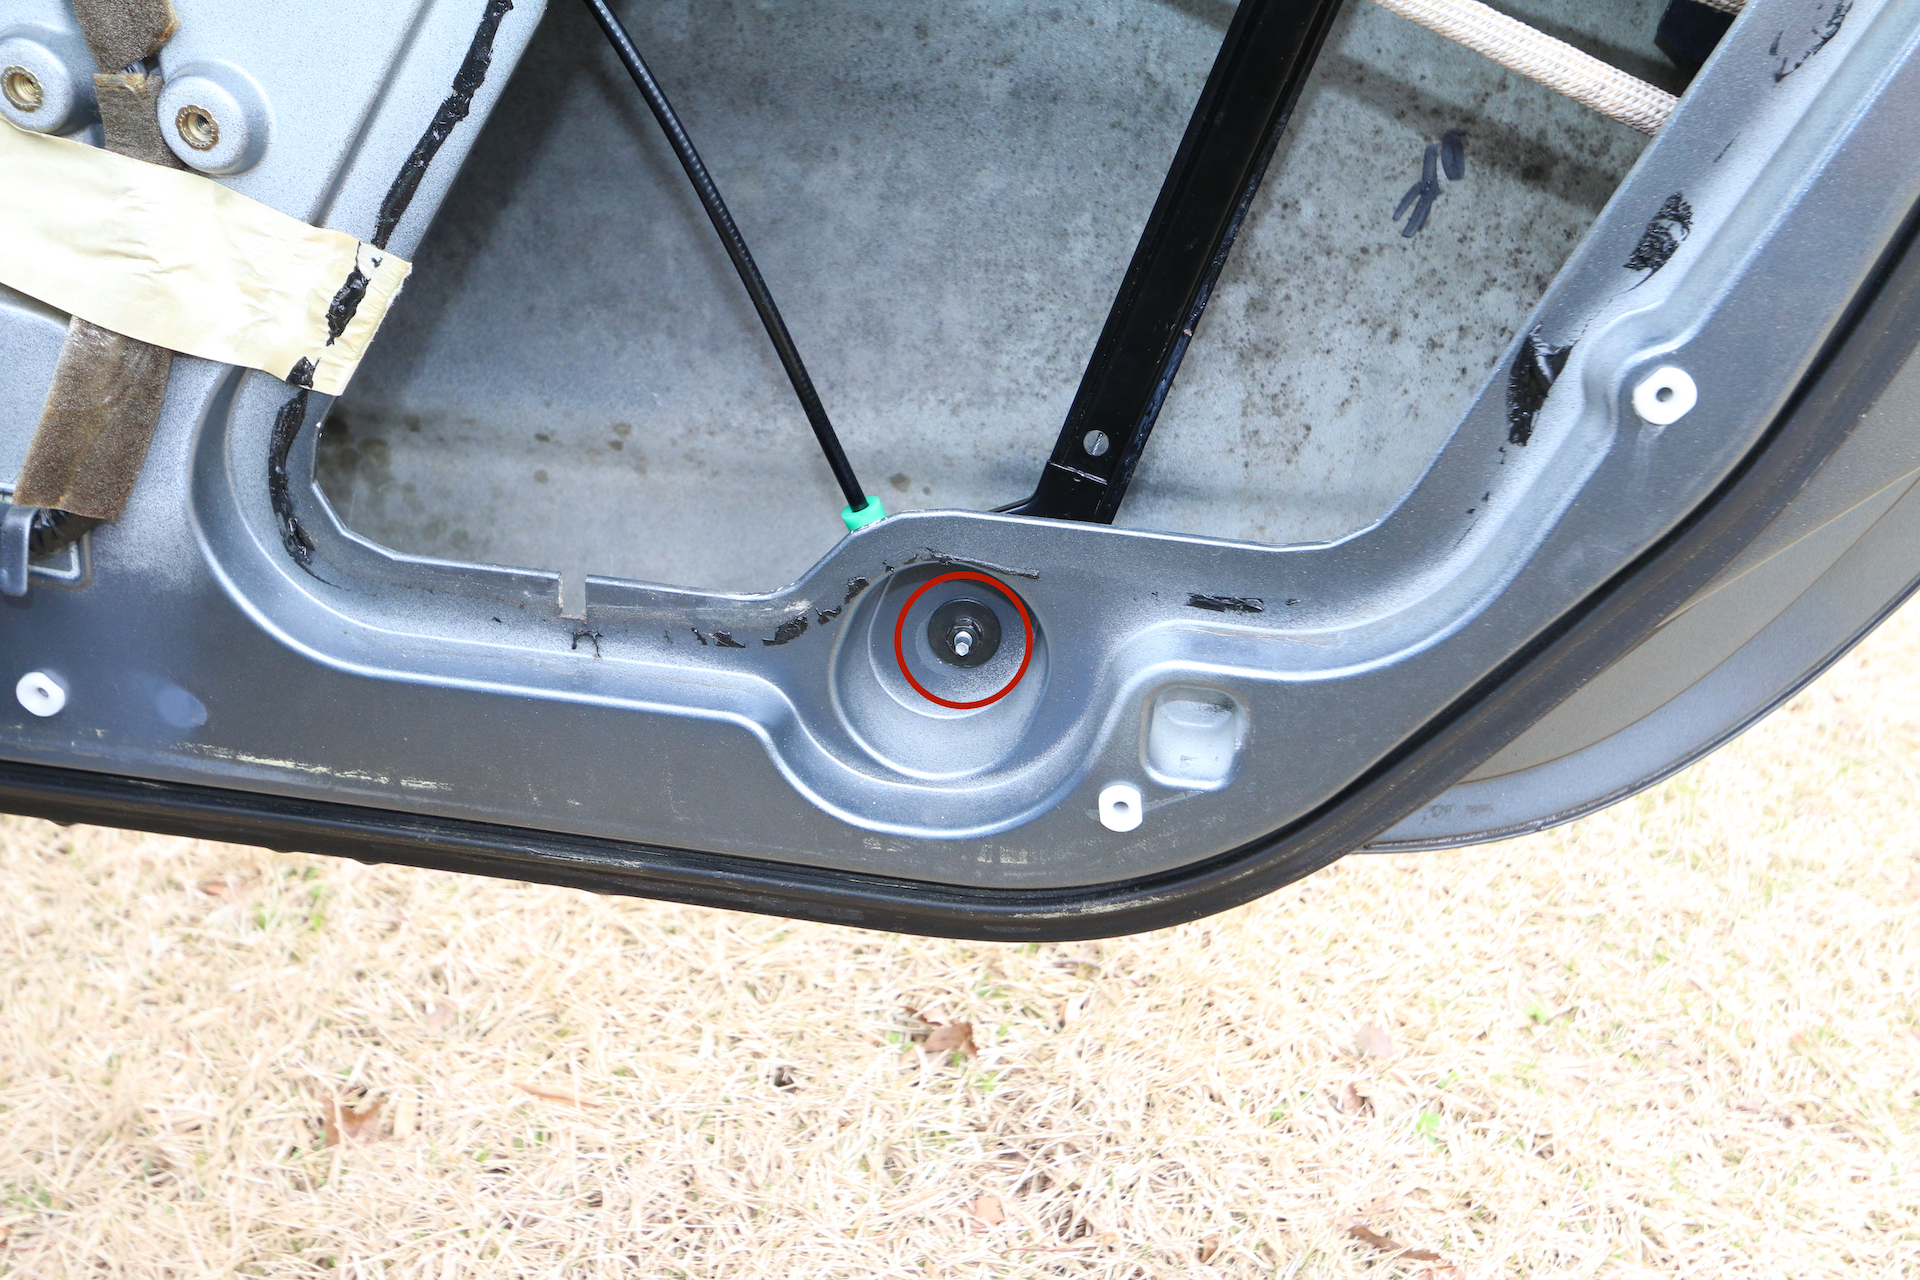
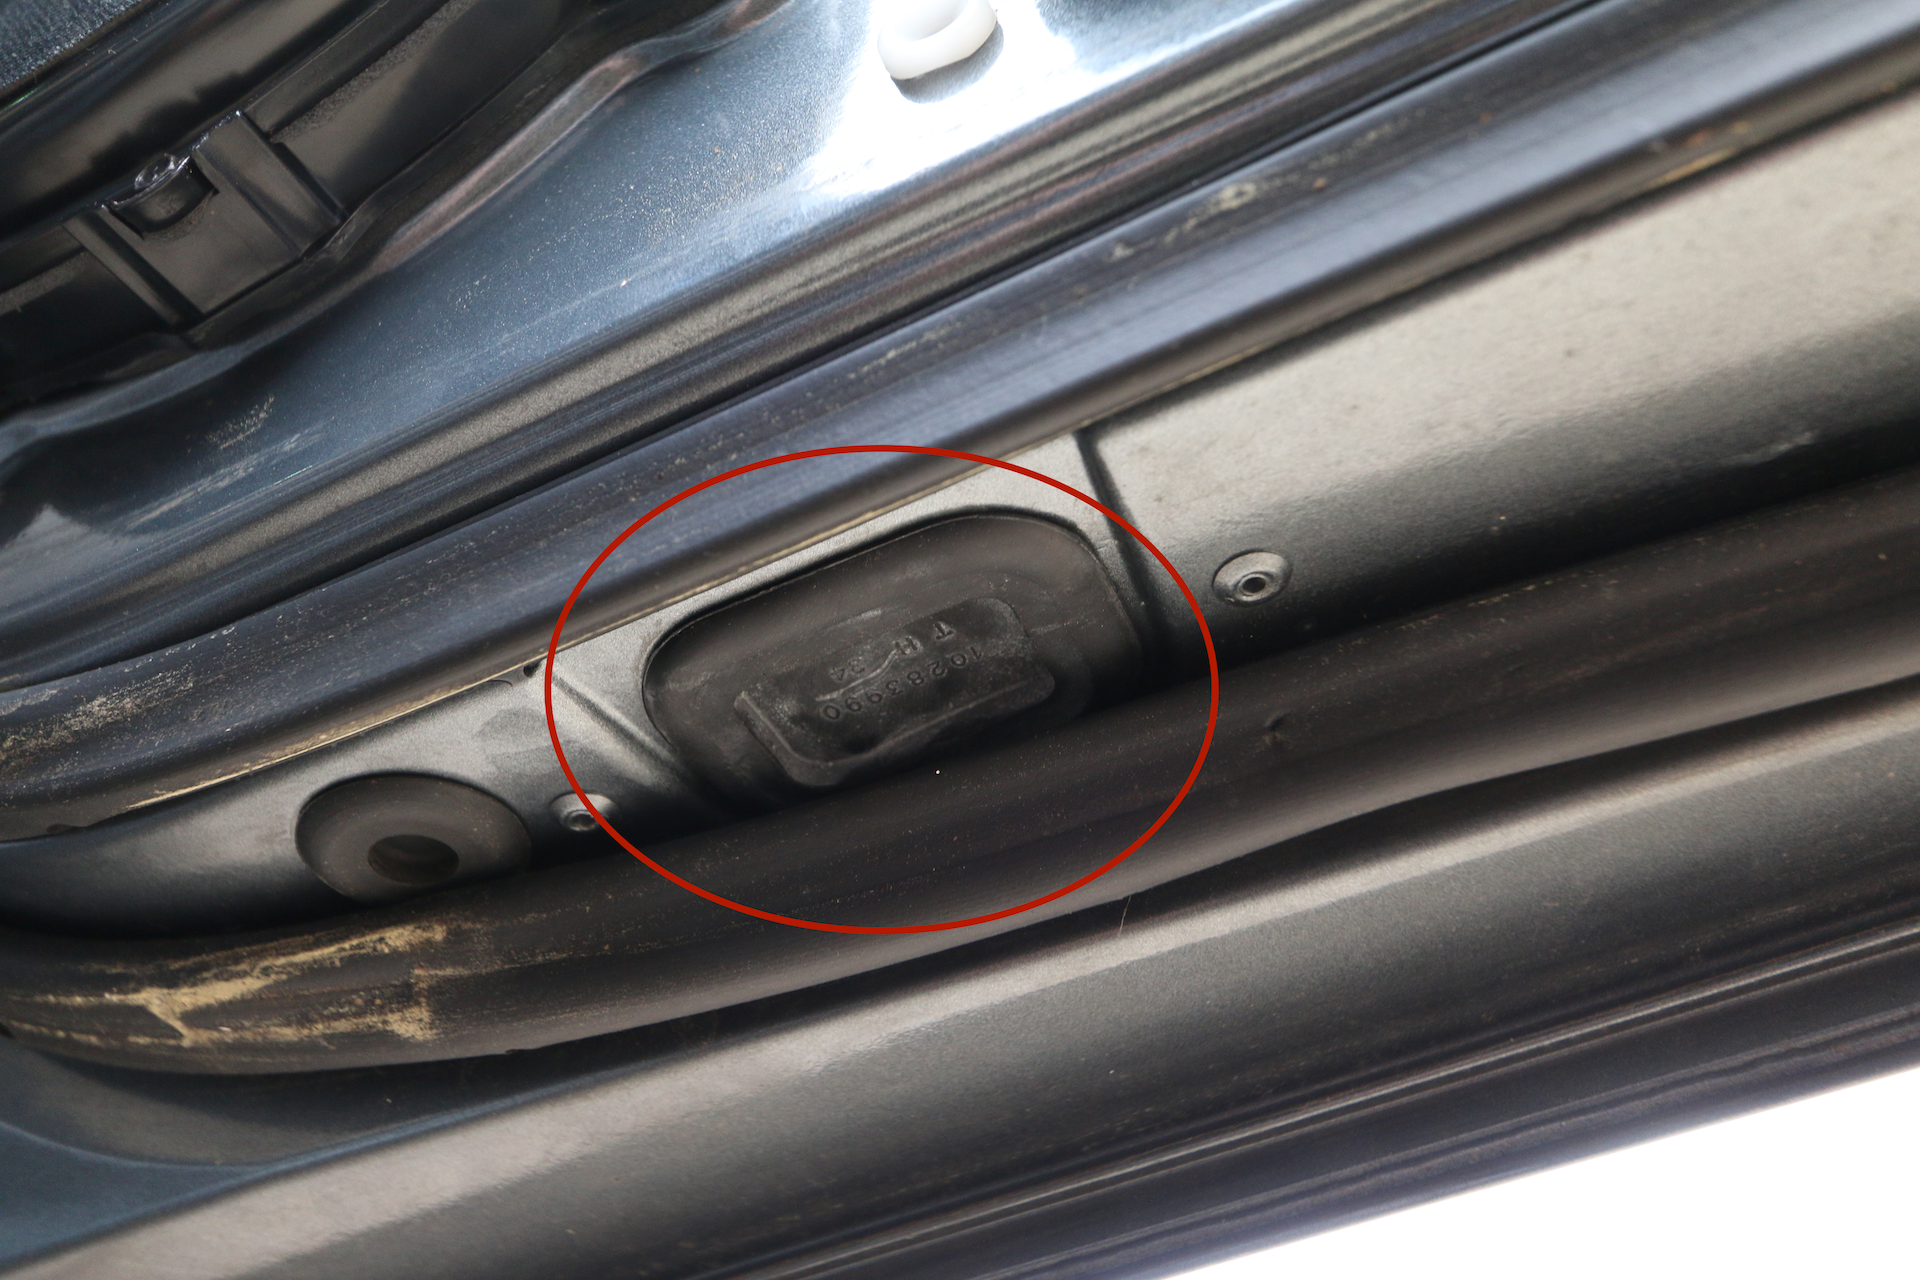
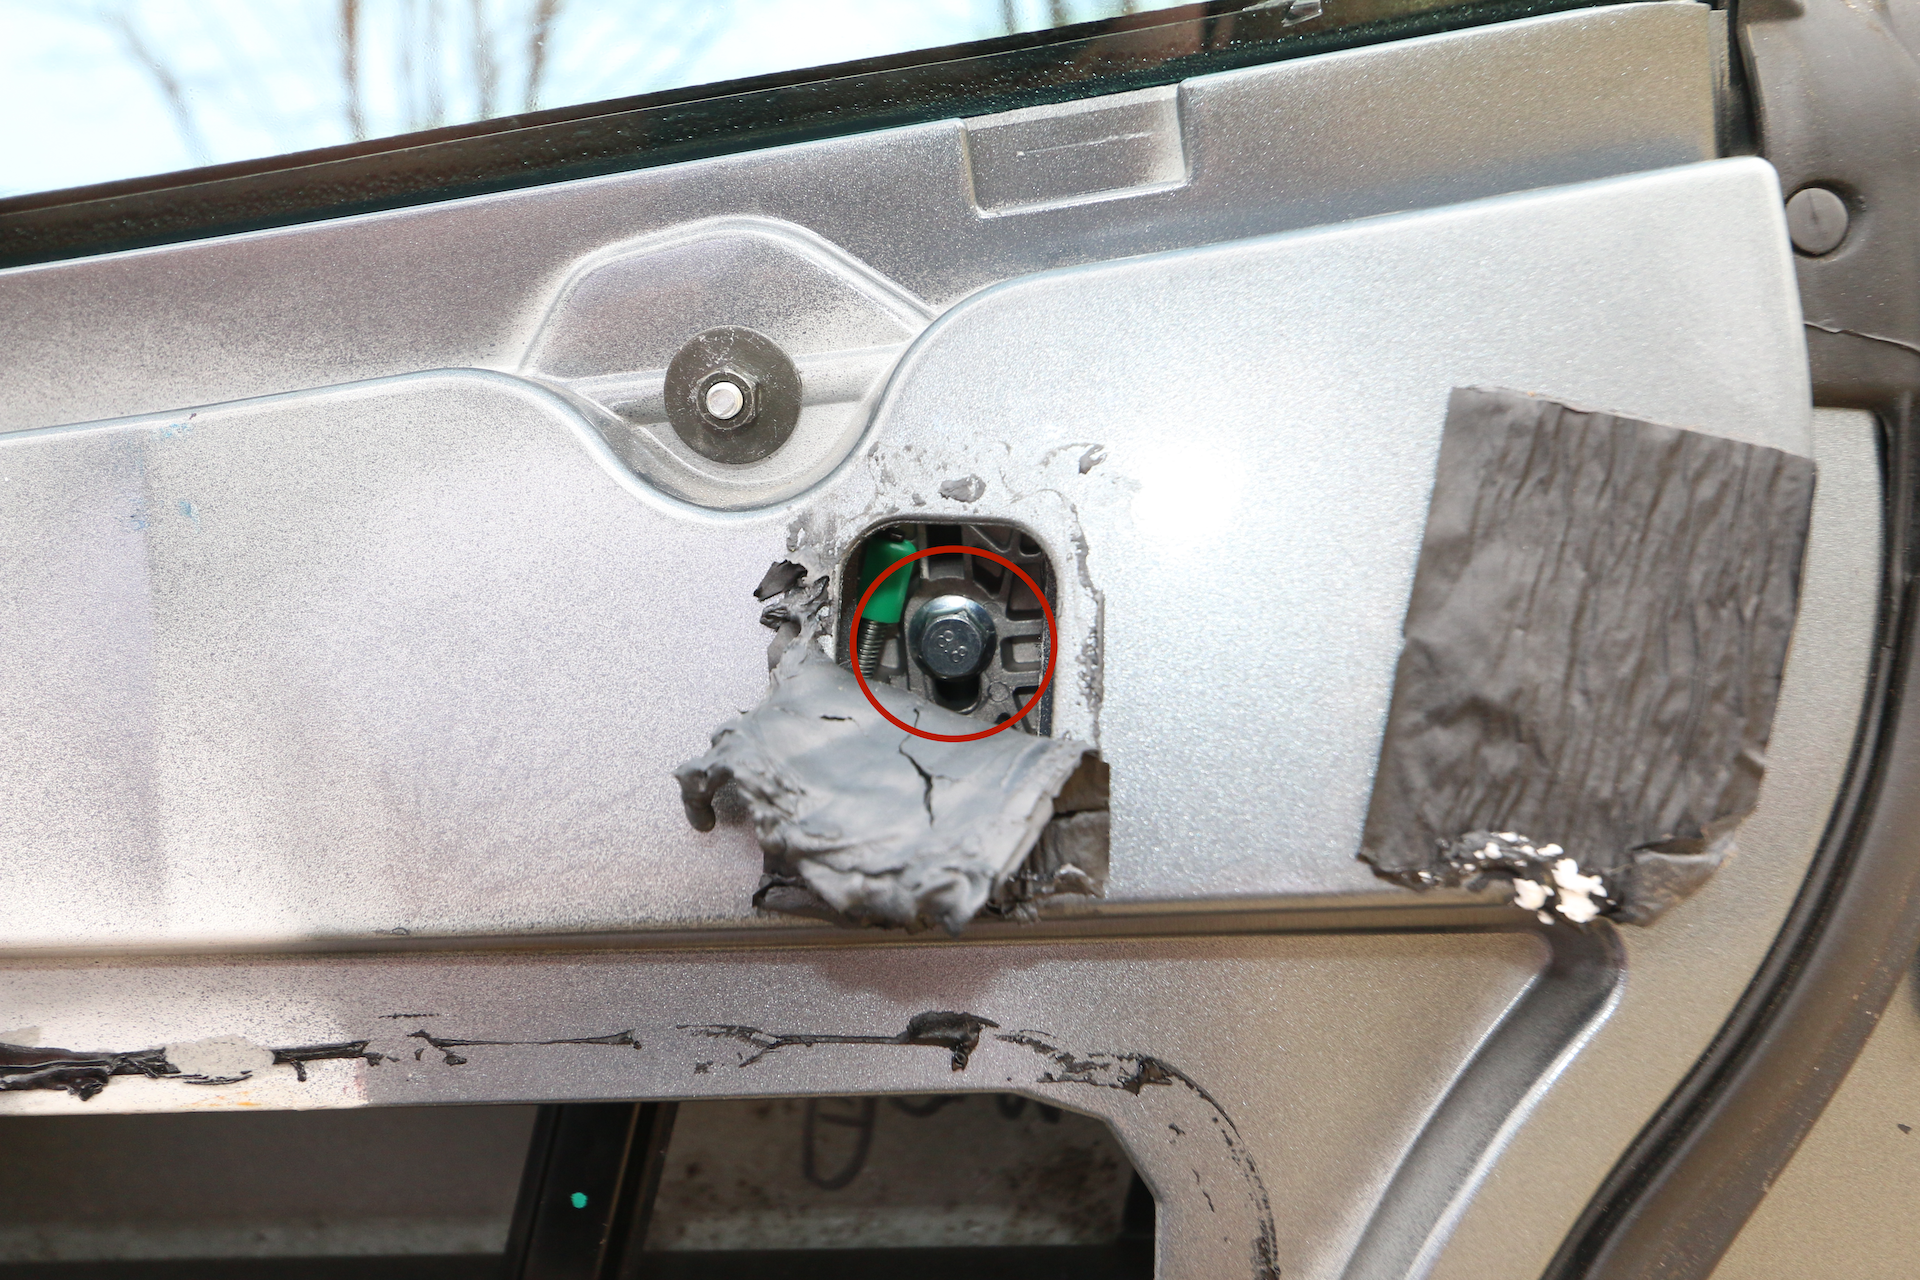
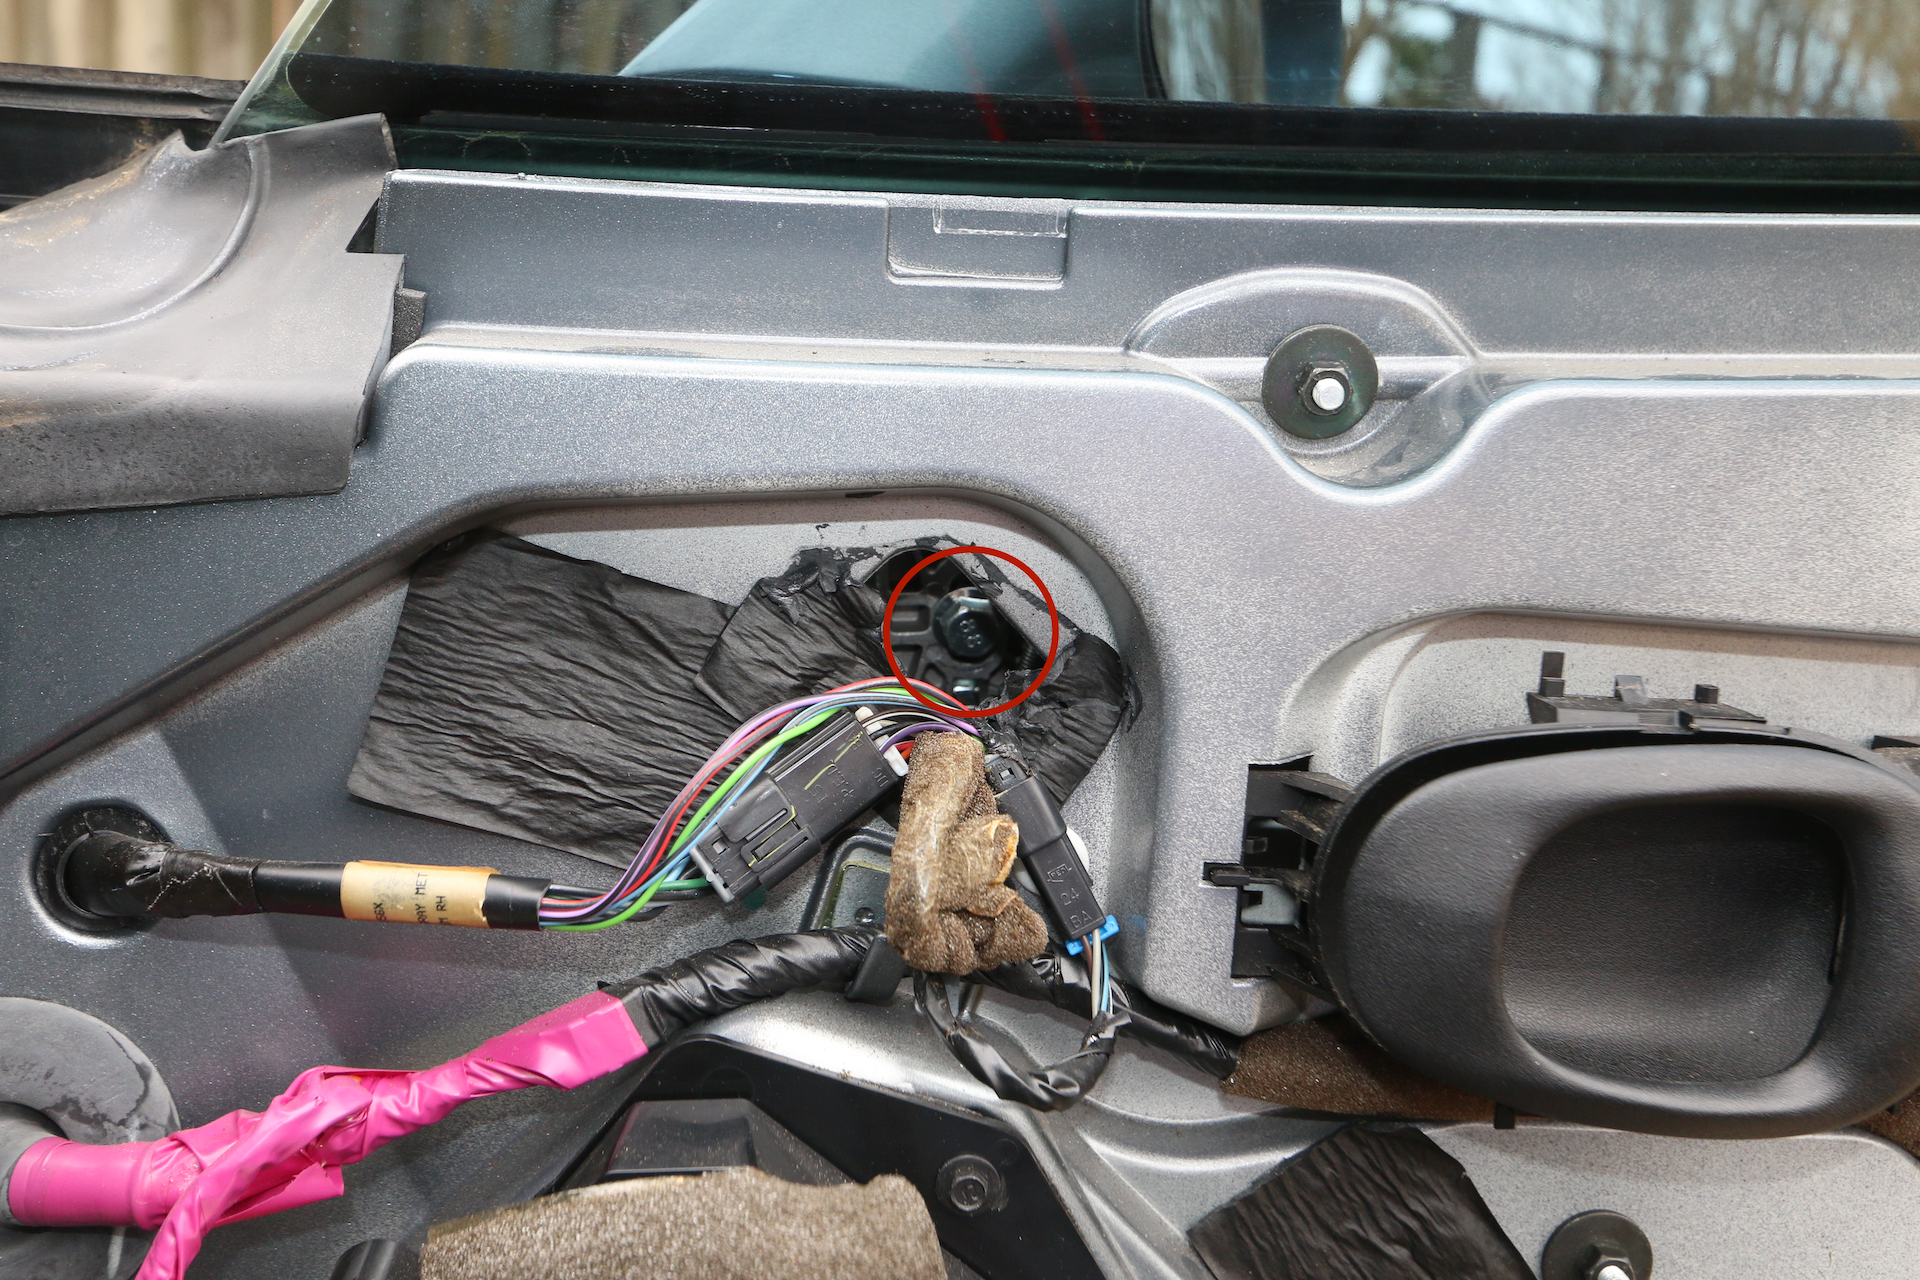
Loosen the four main bolts securing the window regulator to the door. Note that the bottom left bolt is hidden under the door behind a rubber gasket that will need to be removed with a trim removal tool. (See photos.)

IMG_0046.png
IMG_0043.png
IMG_0042.png
IMG_0044.png
IMG_0028.png
IMG_0046.png IMG_0043.png IMG_0042.png IMG_0044.png IMG_0028.png
 

Step 7:

Once all four nuts to the window regulator frame are loose but not removed loosen bolt the two bolts securing the window glass to the top of the regulator. Be careful not to damage glass. You may also need to use a trim removal tool to pry bracket from window. Once loose carefully lift up on window and remove it placing it in a soft safe place as to not get damaged.

IMG_0040.png
IMG_0039.png
IMG_0040.png IMG_0039.png

Step 8:

Remove three nuts securing regulator motor to door. You can now remove the four previously loosened regulator nuts and remove the window regulator assembly through large opening in door. Note that it is best to fold the regulator together and pull the bottom out first.

Step 9:

Reinstall and you are DONE!!!

For more information check out the video I made above where I explain in more detail the processes outlined in this post or feel free to contact me and I’ll do my best to answer any questions.

Need More Information?
 

tags: 2003, Corvette, How, To, Replace, Window, Regulator, Remove, Door, Panel, C5
Tuesday 12.08.20
Posted by Chris Askew
 

How To Replace Driver Side Mirror - 2003 (C5) Corvette

The drivers side rear view mirror on my 2003 Corvette began to delaminate about 2.5 years ago. Initially the local Chevrolet dealer wanted to replace the whole assembly and charge me around $650 for the repair. I decided not to do the repair but it had got to the point here I could no longer see out the mirror so something had to be done.

After searching the web I found a site called CULTRAG Performance. I gave them a call and they were able to find what I was looking for.

My car has the heated and auto dim features so that makes the cost significantly higher but still less than half what the dealer was going to charge. I have included a video and photos below showing how to do this repair.

Tools / Parts:

  • 2003 C5 Left Hand Glass Only - Heated - Auto Dimming $323.00 (Order Here)

  • Trim Removal Tools

  • 2’’ x 3’’ Wood Block

  • Small Soft Cloth

  • Flat Head Screwdrivers

Removal / Install Instructions

Everything I found online had very little detail on how to do this so I hope this helps someone who is having the same issue.

If you have any questions about the process feel free to contact me below.

Need More Information?

Watch Video Below For More Detailed Instruction


Step 1:

Carefully remove mirror by prying glass from housing. I used a trim removal tool for this. Be careful not to damage the actuator arms and clips inside the mirror assembly.


Here you can see the connection points behind the mirror. These all have to align when reinstalling mirror. Using a flashlight during removal and install can be helpful to make sure everything is aligned properly.


Step 2:

Using two flat head screwdrivers carefully remove two connector rods from old mirror. These are ball joints and are made of plastic. Make sure to apply slow even pressure to making sure to not damage them.


Orient new mirror to match old mirror and install connector rods from old mirror on your new mirror.


I used a small piece of wood to press ball joints into new mirror. Carefully use firm even pressure during this process you don’t want to damage new mirror by using too much force.


Step 3:

Install new mirror by aligning all connector rods and ball joints. Using a 2’’ x 3’’ wood block with a soft cloth placed between the block and mirror carefully but firmly press the center of the mirror toward the housing. You will hear several pops as the ball joints and other connectors snap into place.

Inspect mirror to make sure it operates normally and is not loose.

Once you do this you are done!

tags: 2003, C5, Corvette, How, to, Replace, Mirror, Driver, Install, Remove, Instructions, Chevrolet
categories: How To
Wednesday 03.04.20
Posted by Chris Askew
Comments: 10